Repairing a Husqvarna QC330 battery charger
Husqvarna isn’t known for its customer care. In general you have two options when a Husqvarna product dies: buy a new one or try to repair it yourself. If you choose the last option, you are on your own when it comes to their battery powered tools. Of course they do not provide any technical information about the electronics.
2024-06-17
The problem
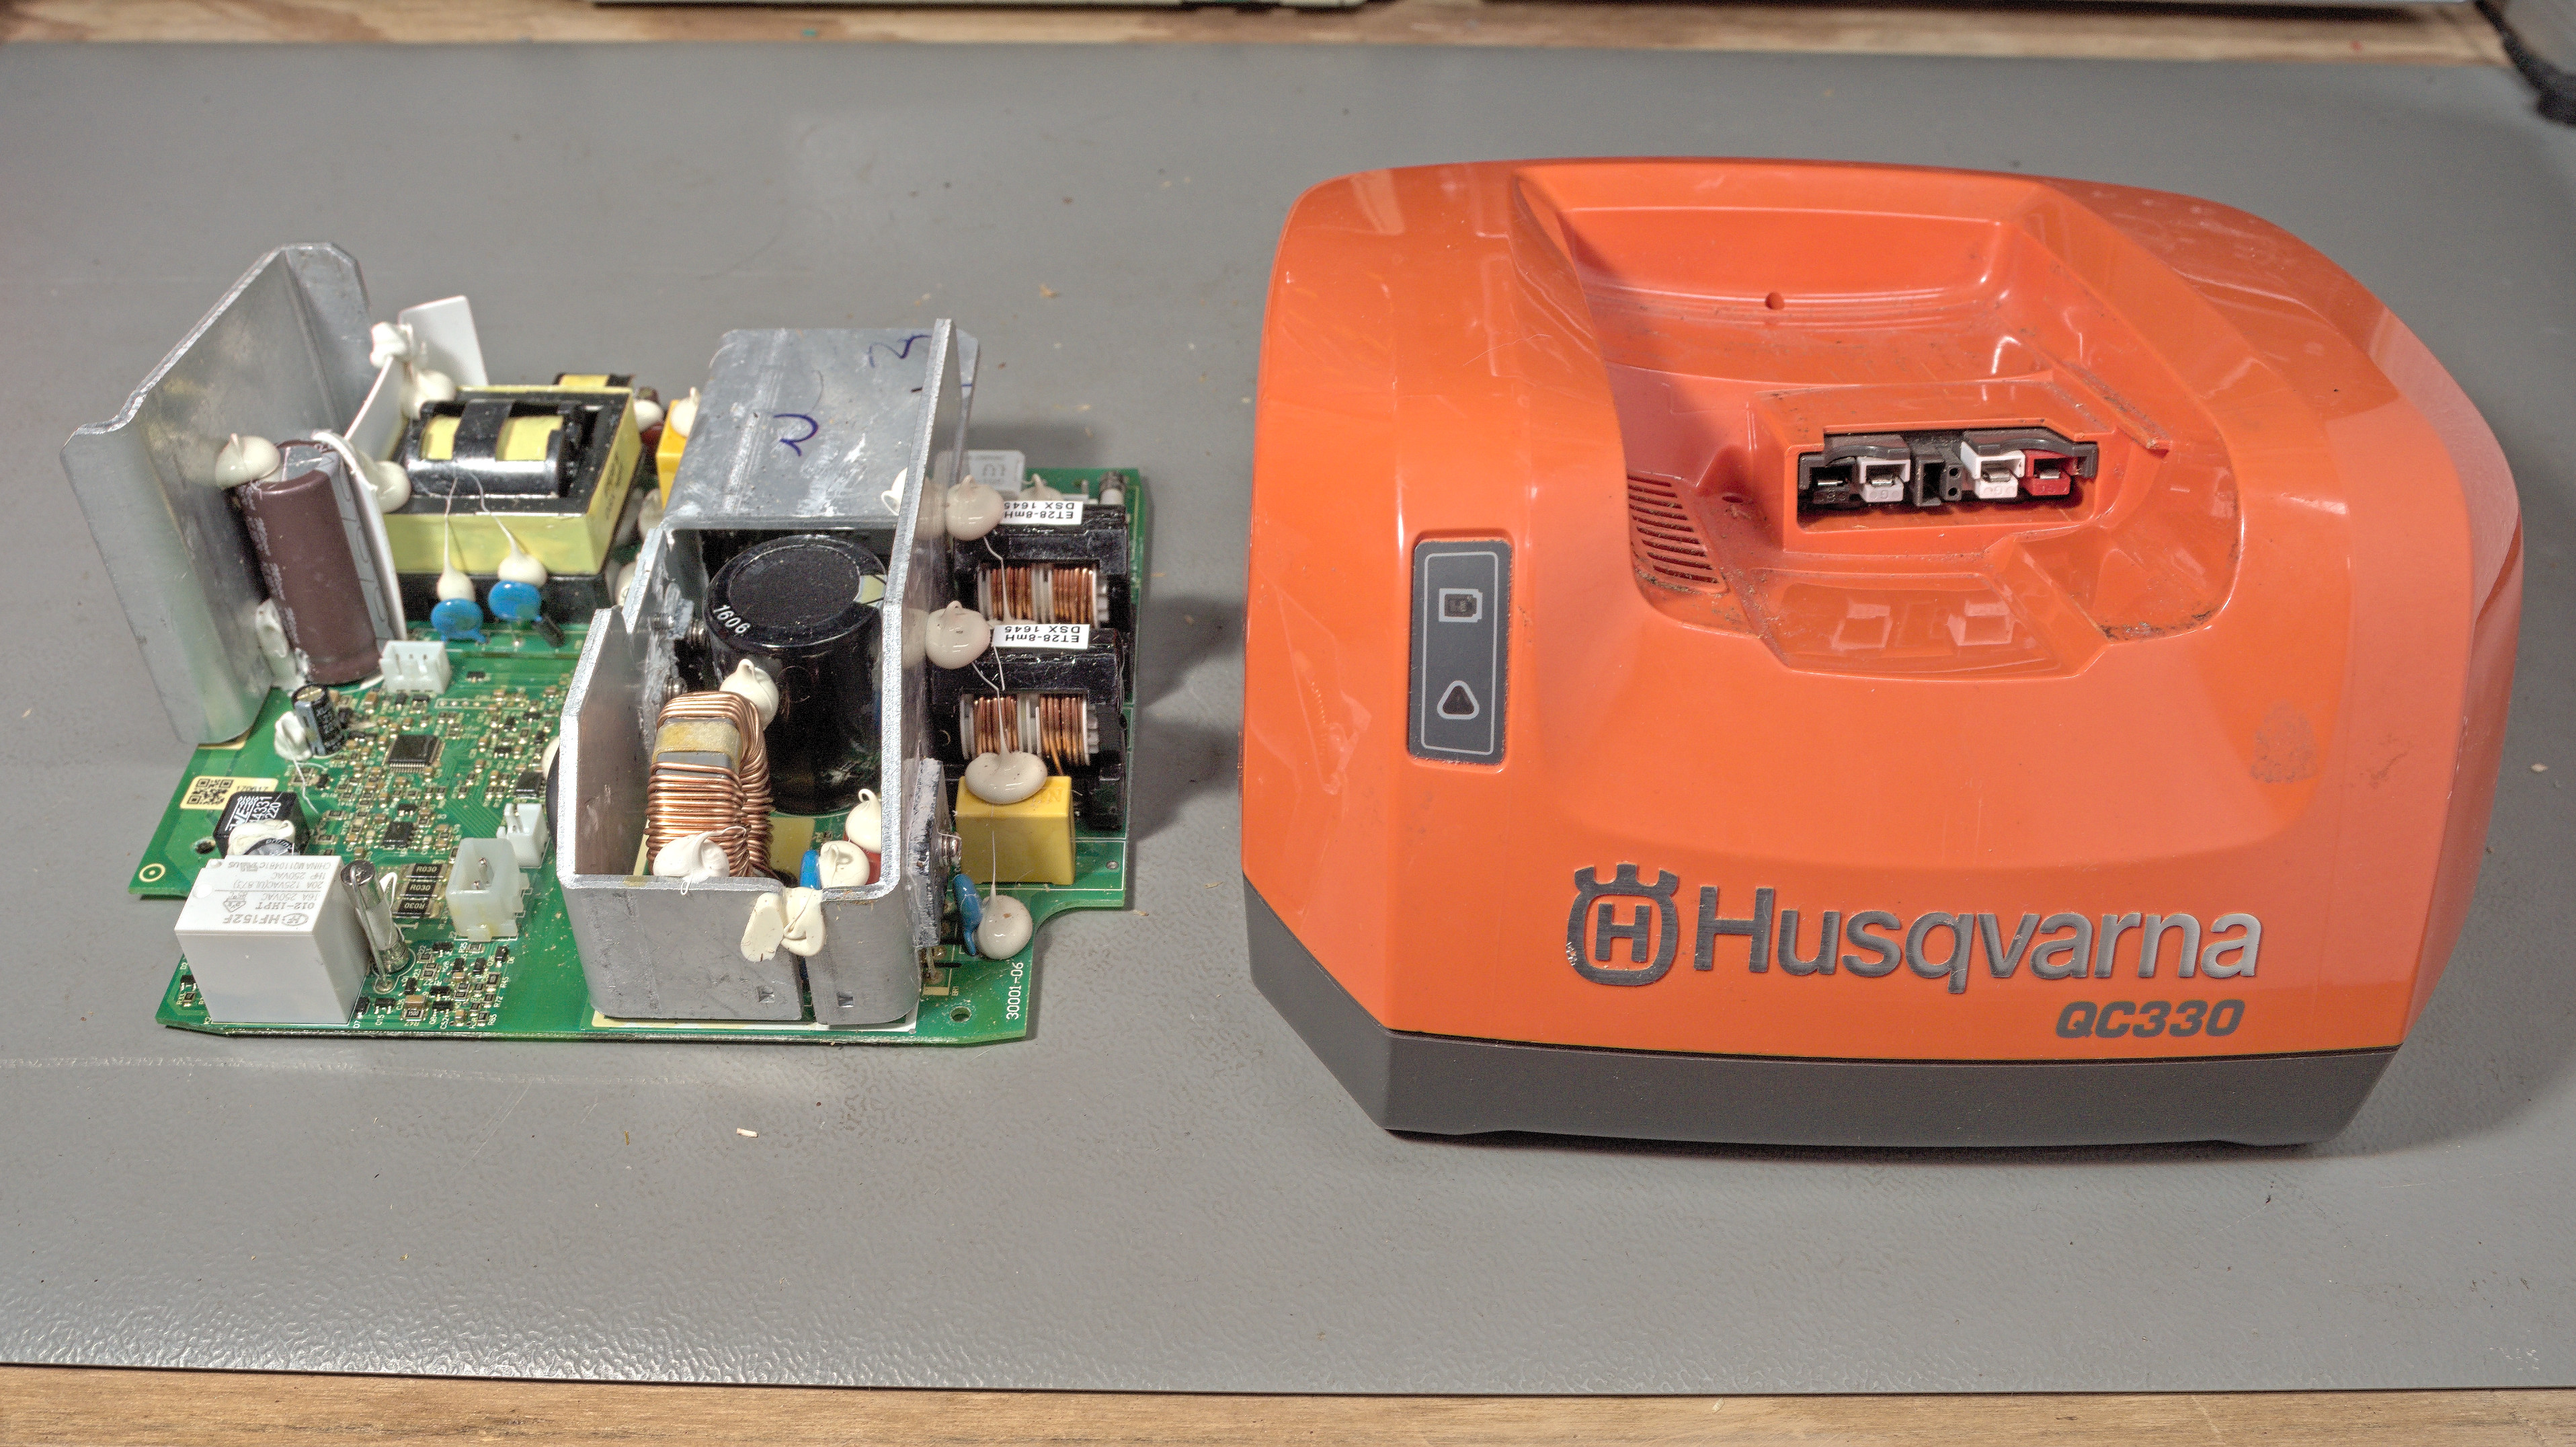
The Husqvarna QC330 battery charger does not work at all. None of the LEDs light up, the charger appears to be dead. When plugged in, a barely audible hissing sound can be heard. It could be a switched mode power supply failing to start up.

Finding the fault
I only could find one mention of a repair attempt on the internet. A person called L.A Consertos made a video. Unfortunately the video is in Portuguese. But with some perseverance, I could understand it well enough to know what the problem with his device was: a shorted Schottky diode. Could it be my charger had the same problem?

Attempting to repair
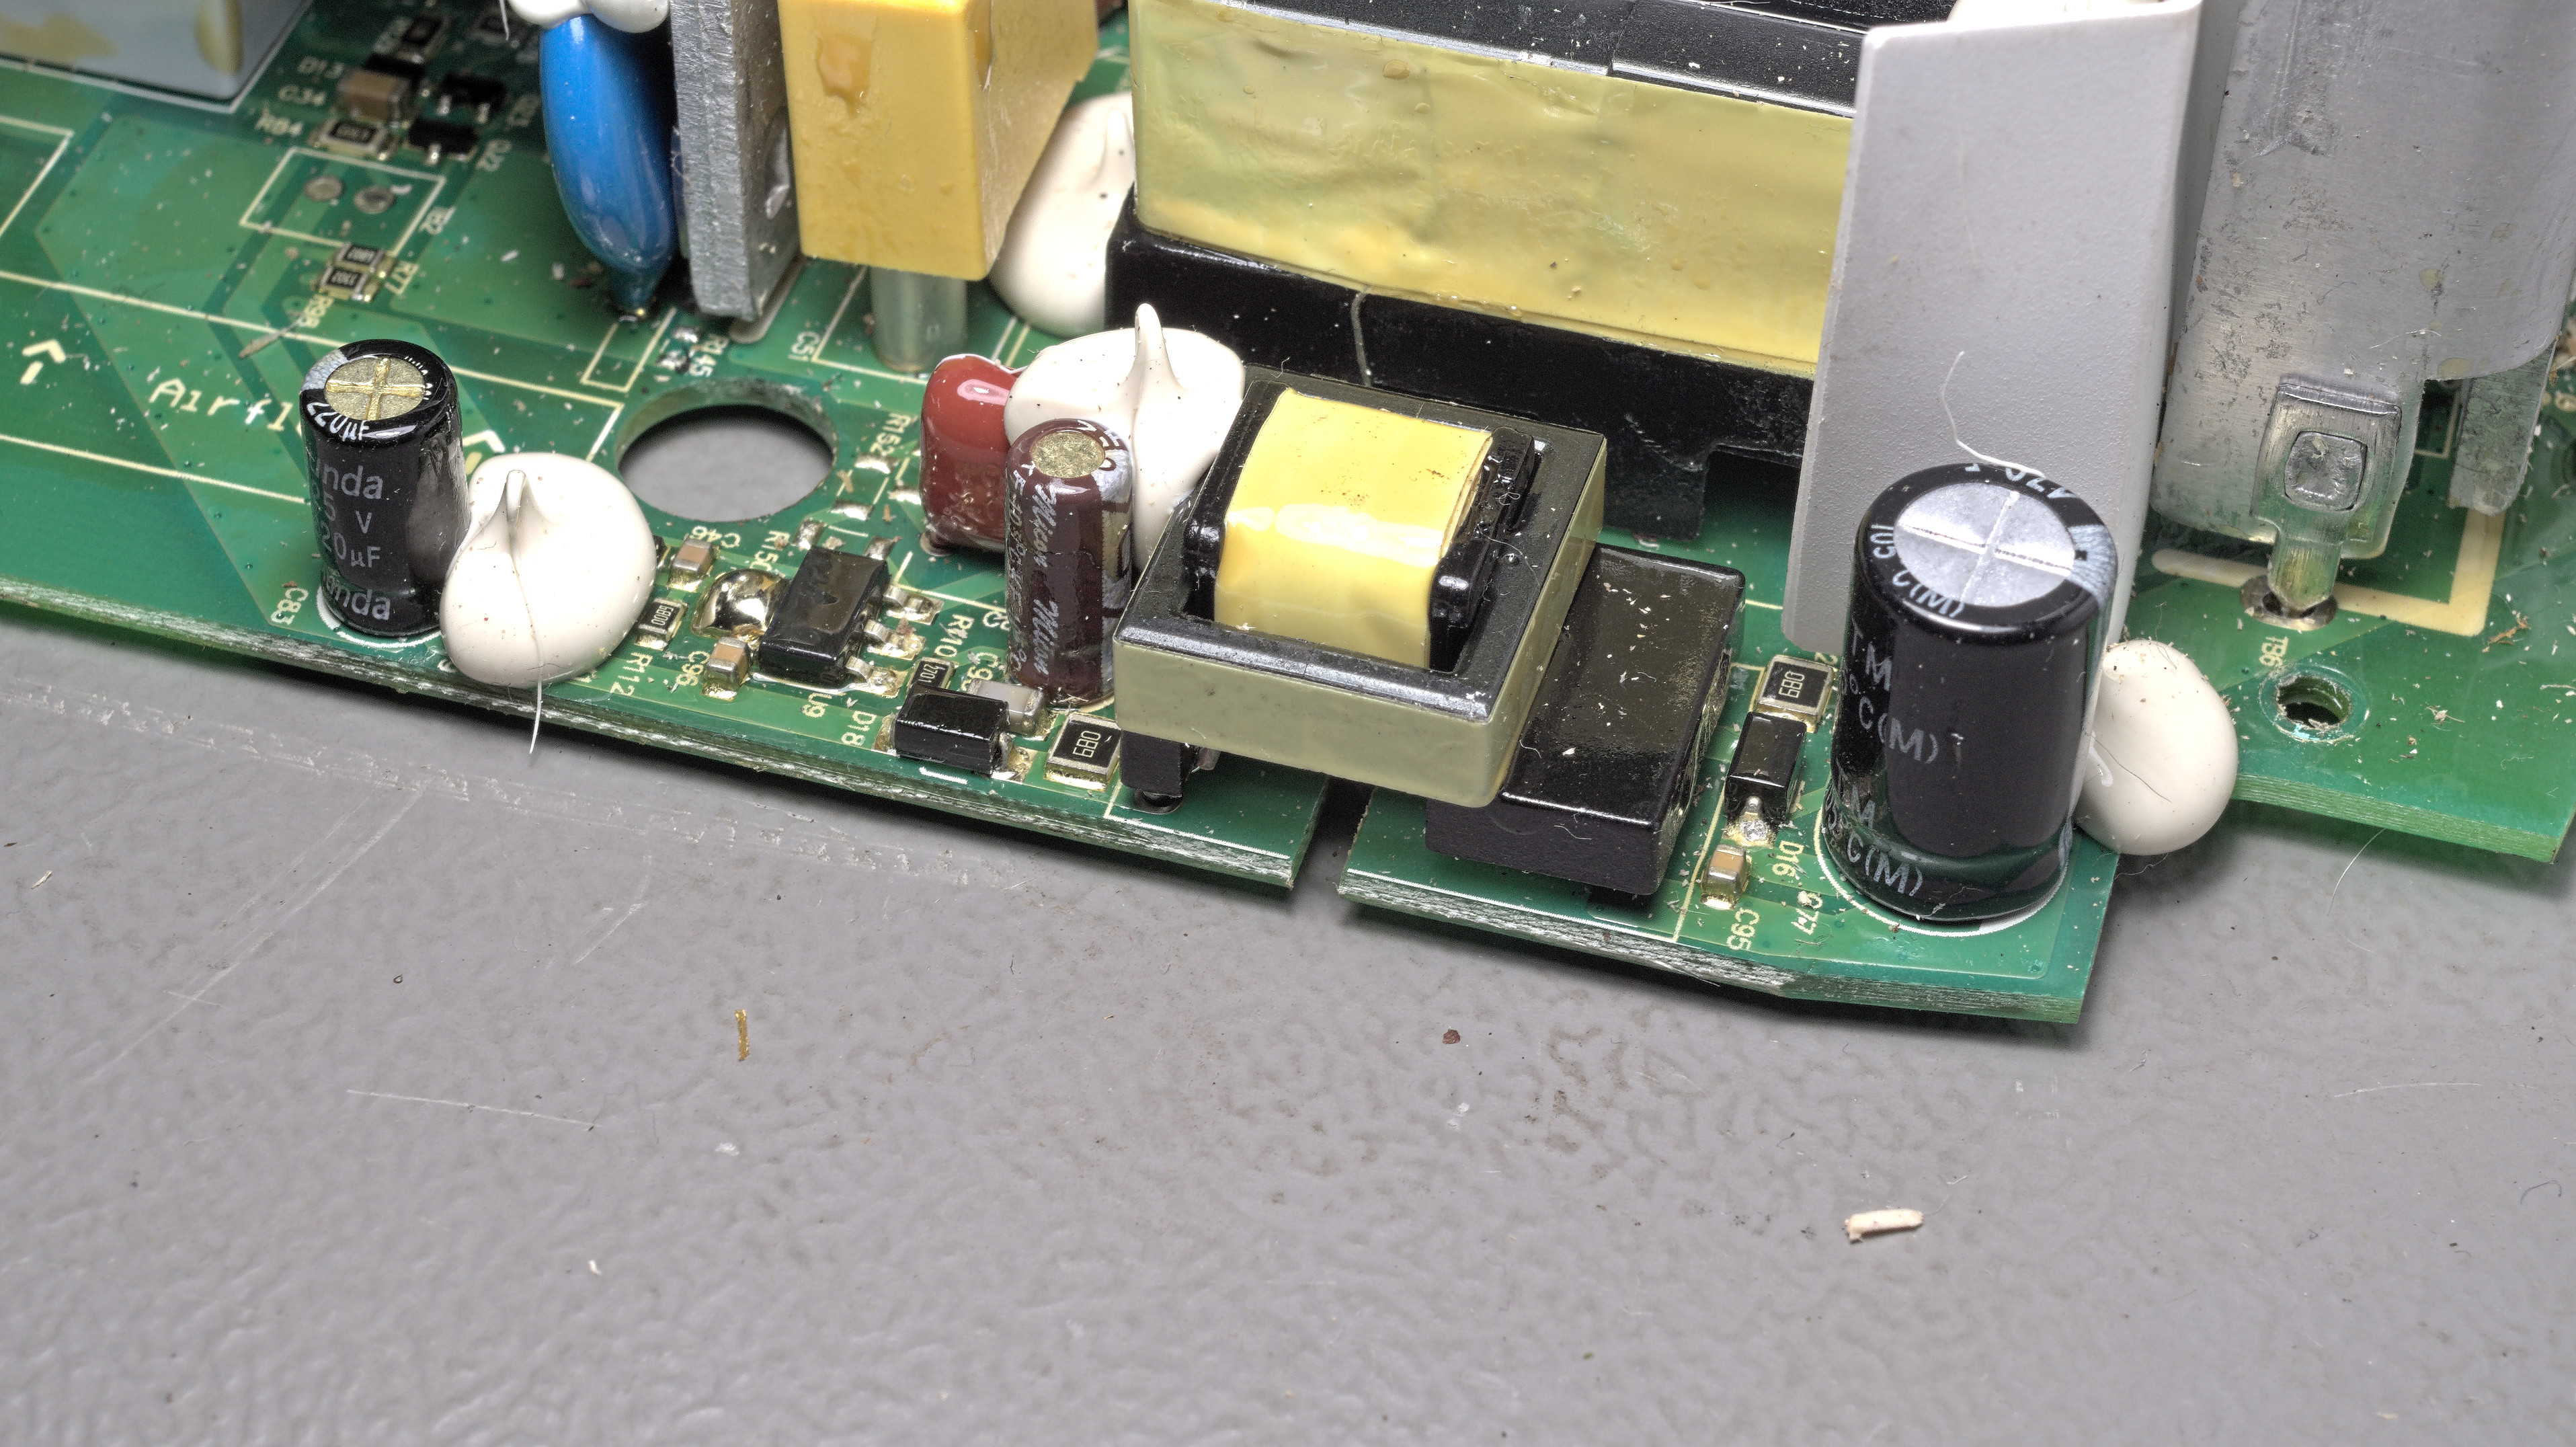
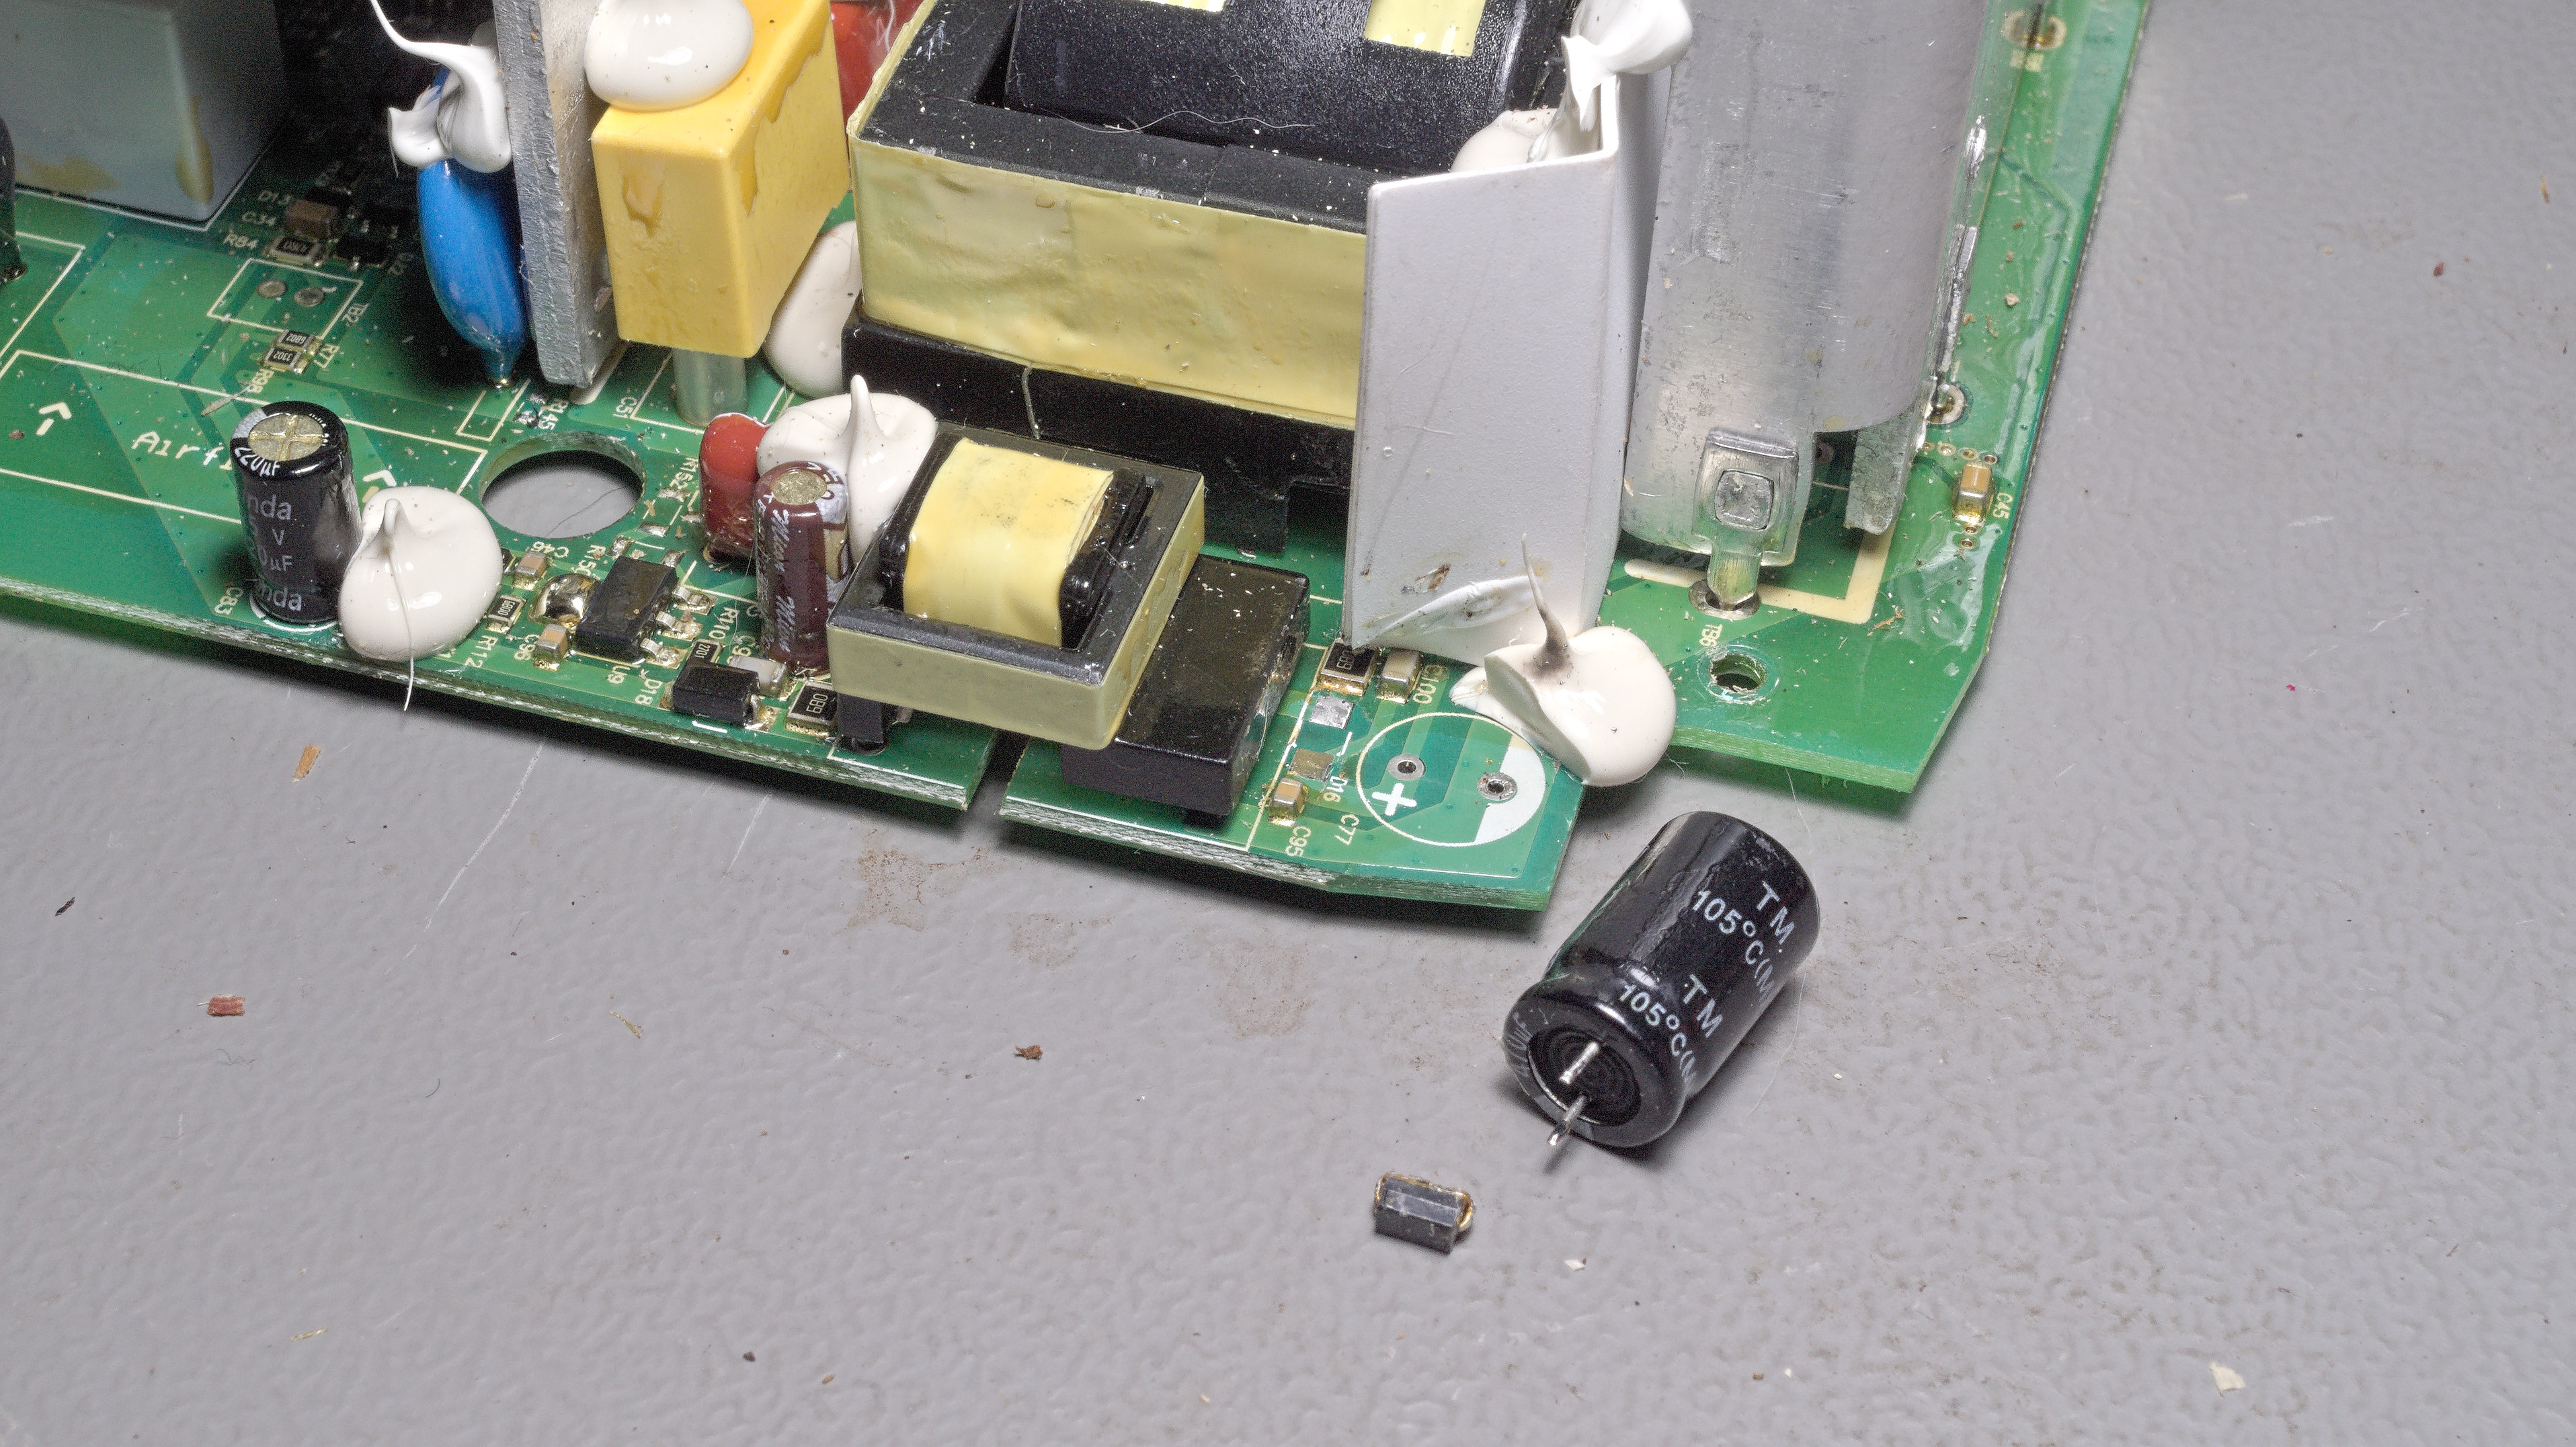
After removing the rubber feet, four screws must be removed to open the housing. A further four screws hold down the PCB. After removing the PCB I measured the Schottky diode, an SS110, and found that it was indeed shorted. This rectifier diode is part of the power supply of the secondary charge circuit. The electrolytic capacitor next to it is the smoothing capacitor and could also be damaged. Therefore, I removed the diode as well as the capacitor and cleaned the soldering pads of the PCB. Then I measured the capacitor with an LCR meter just to find that it was in perfect condition. So it appears that only the diode is damaged.
It could be an coincidence that my unit had the same problem as the unit of L.A. Consertos. It could be a design fault of Husqvarna. But it could also be a manufacturing fault in the diode itself. Without proper documentation from Husqvarna, we shall never know.

Repaired
Replacing the defective diode solved the problem and the charger is working again. It is unfortunate that without proper documentation from the manufacturer and without a repair attitude among the public, broken devices which could easily be repaired end up in landfill.
Or is it?
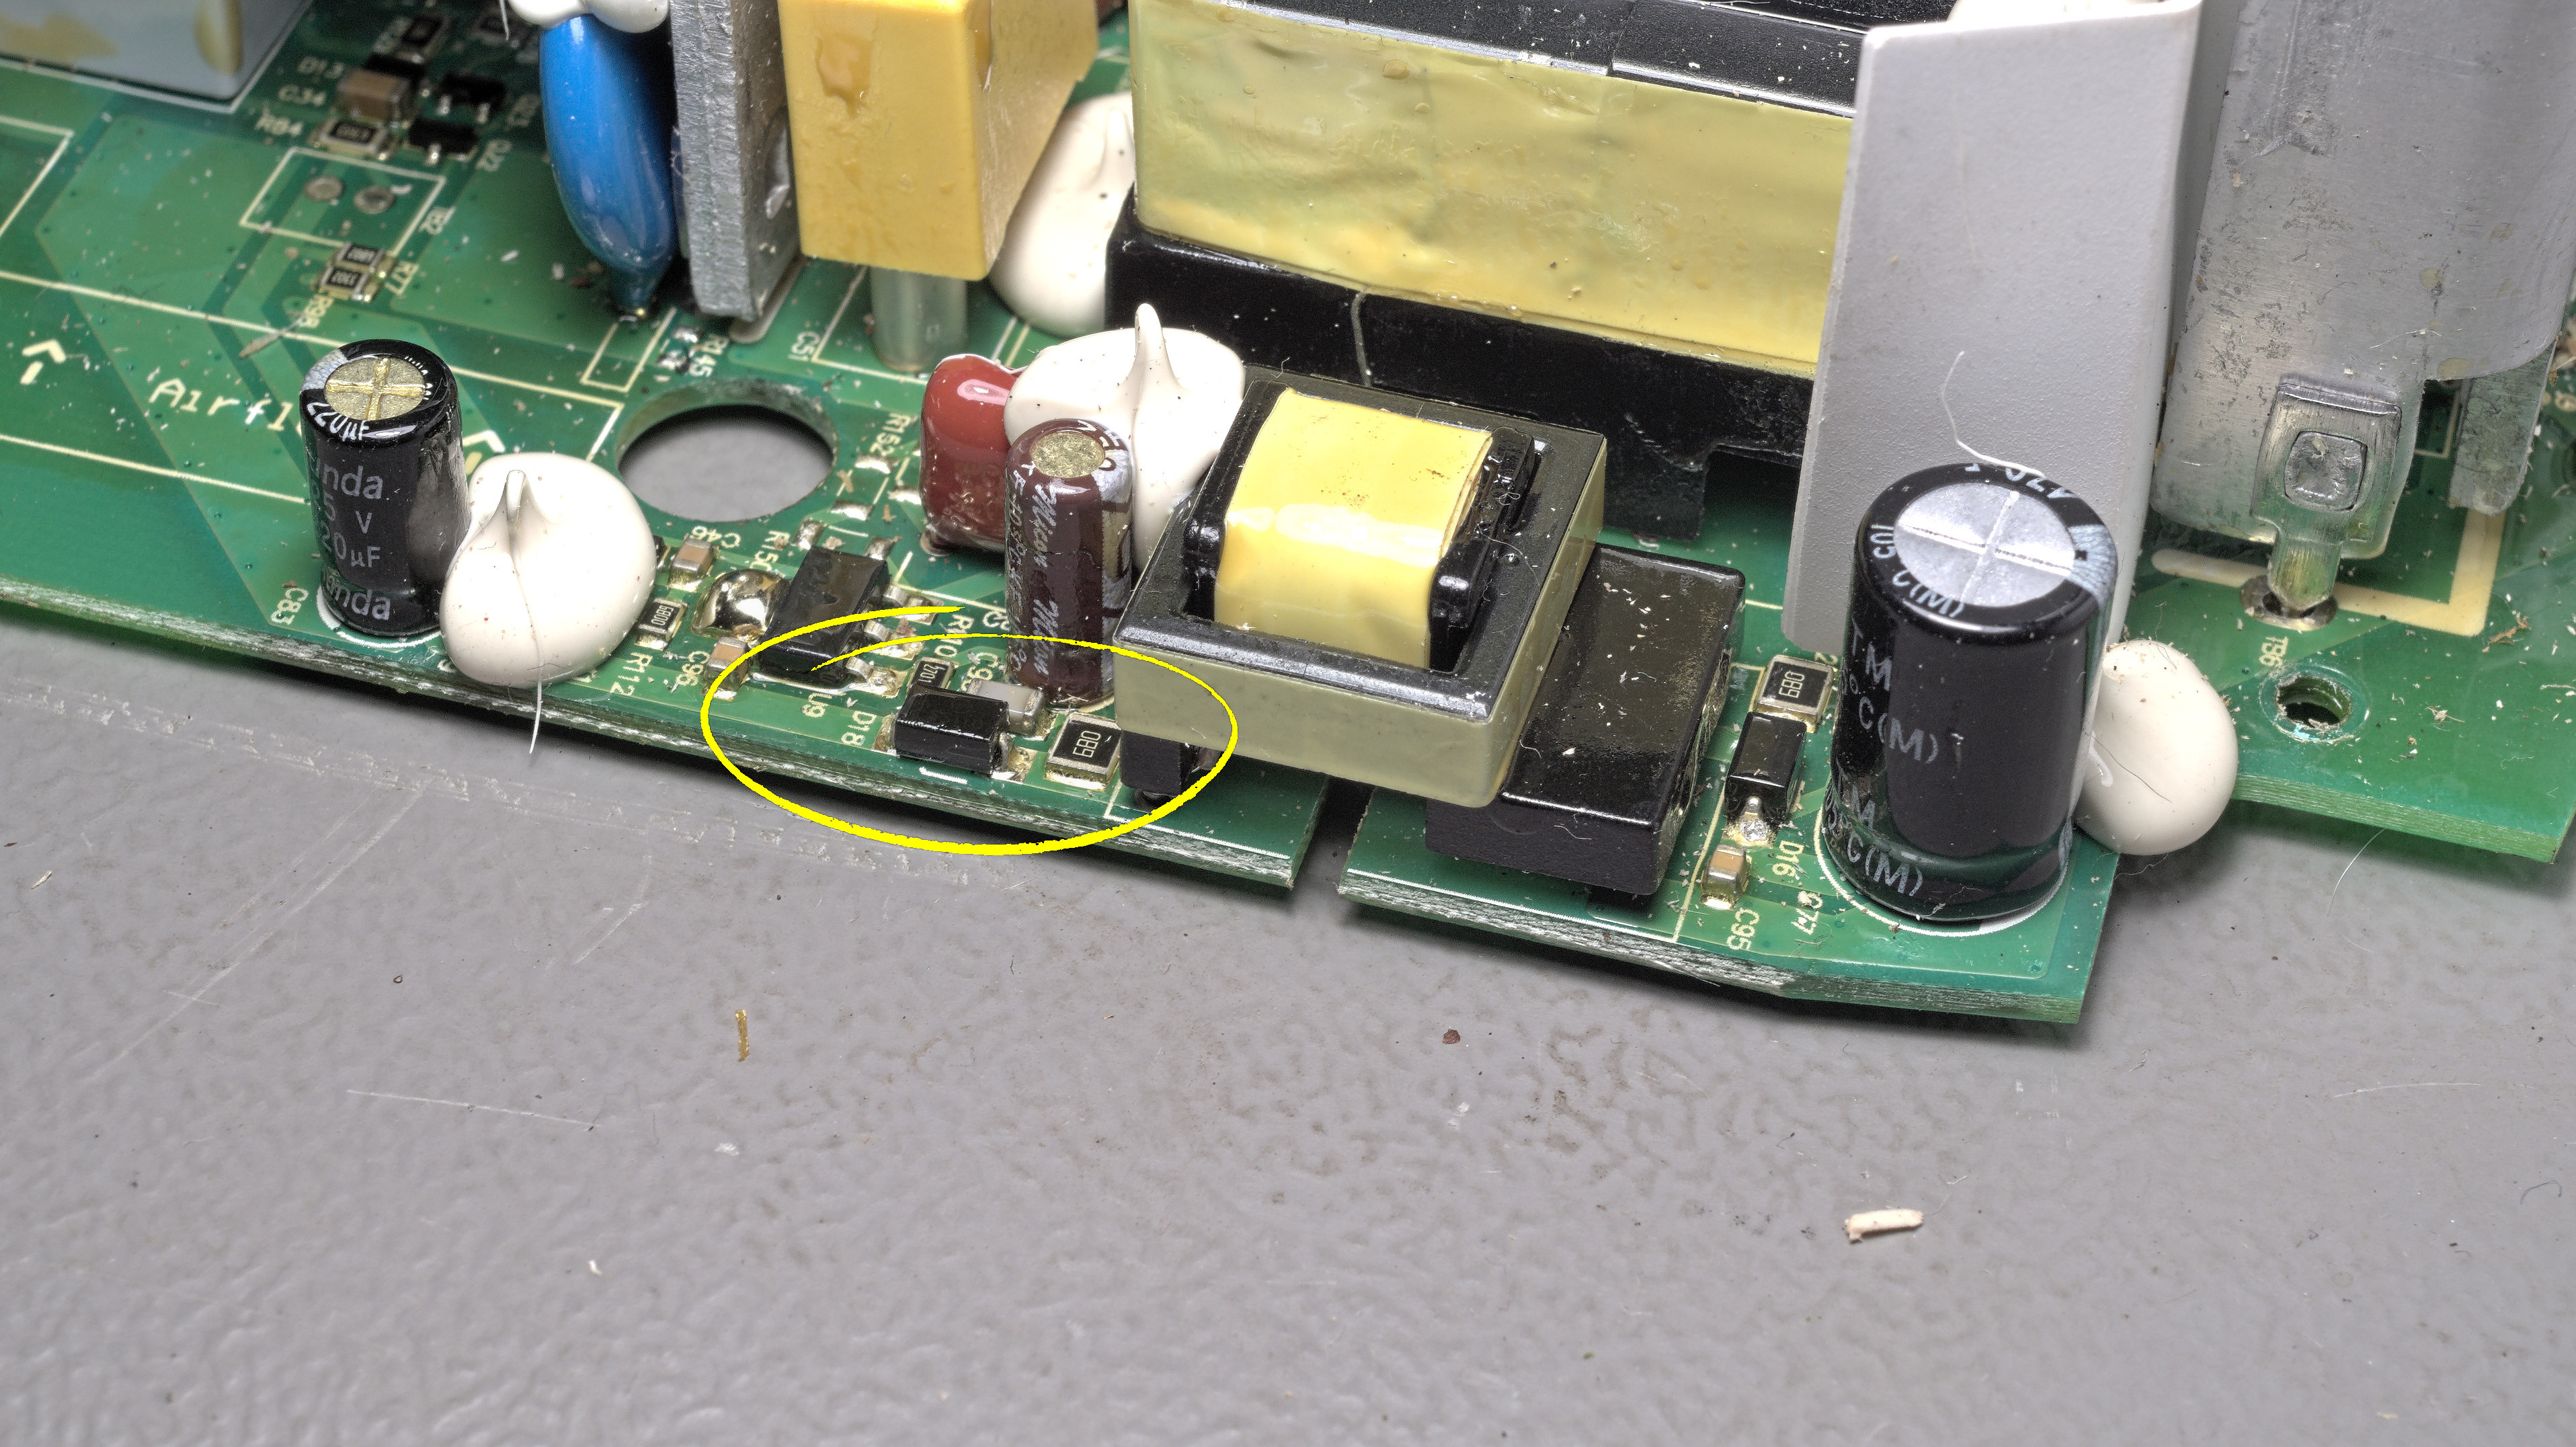
After the repair the charger worked for about 6 months. But one day it stopped working again. Once again, a diode gave up the ghost. Not the same as before but another SS110 had become a jumper. I replaced the diode and the device came back to life. Now I strongly suspect a manufacturing fault in the diodes. I would advice anyone with the same problem to replace all the SS110 diodes in the power supply of the secondary charge circuit. Just to be safe.

Documentation
Some messages I received
Maarten (translated from Dutch)
I ran into the same problem you had, but with a QC500 charger.
My QC500 charger has a slightly different layout, but the part you repaired is exactly the same.
With me the problem was not the diode marked as D16, but the diode D18 on the other side. I also replaced it with an S110. Because I ordered it. At first, I randomly replace D16 and the capacitor, but that didn’t help. Thanks for the information, my QC500 is repaired again!
Eef (translated from Dutch)
I would like to thank you for the information on your website about the repair of the Husquarna QC330 charger. Got one of those that suddenly stopped working. Seems to have something to do with a few power outages. Maybe it couldn’t handle the peak currents. With your explanation and the Portuguese video (now with English subtitles) I looked at the Schottky diodes. I measured both sides, which both where almost a short. So sure there was something wrong there.
Meanwhile the diode is replaced by a 5 amp max. Had to replace the capacitor too, as I could pull the legs right out. Must have been cooked. Solved. Here is a picture of the end result.
